How Often to Rotate Tires: The Ultimate Guide
Rotate my tires? But they rotate every time I drive?
Yes, your rubber donuts go round and round every time you drive your car, truck, or SUV, but actually rotating them means putting them on a different corner of your vehicle. Tire rotation is a key part in making sure that this expensive part of your vehicle not only lasts as long as possible but in making sure that your tires work their very best to keep you safe and secure on the road. This is your ultimate guide on how often to rotate tires, and how to maintain your tires yourself. When it comes to auto maintenance, eBay Motors has all the parts, accessories and even tools you need for the job.
Every automaker and tire company will give you a slightly different answer when it comes to how often to rotate your tires, but the general rule is to rotate your tires every 6,000-8,000 miles. For many vehicles, that means you should rotate your tires with either every oil change or every other oil change, depending on the service intervals that are best for your vehicle. Of course, lining up a tire rotation with an oil change makes life simpler and easier for you the owner since it means just one trip to the garage.
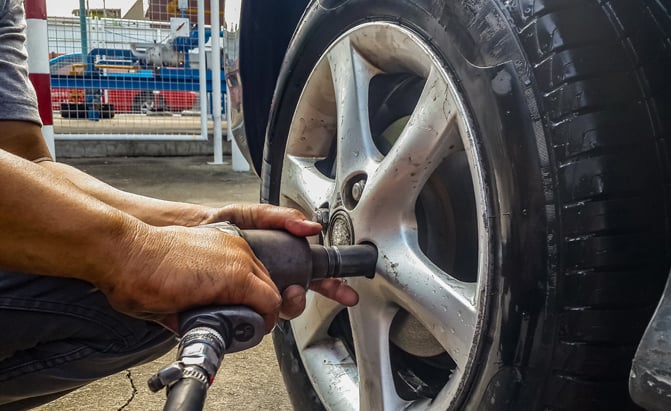
Lead image by Saran_Poroong/Shutterstock.com
Table of contents
What is Tire Rotation?
Tire rotation means moving your tires around the vehicle in a specific pattern. It's done to help your tires wear more evenly, in more ways than one, and to maximize usable tread life.
In a front-wheel-drive car, and most all-wheel-drive crossovers, the front tires do most of the work when it comes to acceleration, while on a rear-wheel-drive truck or SUV, the rear tires do most of the acceleration work. Those forces cause the driven tires to wear more quickly than the undriven tires. Scheduled tire rotation balances the extra wear caused by the driven tires, making sure all four tires wear out at the same time.
In all vehicles, the friction of turning and stopping, and the different suspension geometry between the front and rear wheels, can make tires wear unevenly. For example, tires that steer may see more wear on the edges. Also, if you have any worn suspension components, those can lead to strange wear patterns on your tires. Rotating your tires (and fixing worn suspension components) can give you even tire wear.
The reason you rotate is to ensure uniform tread depth on all four tires. It helps the set of tires to last longer, and it makes your vehicle safer because traction and handling - in both dry weather and rain and snow - will be consistent front and rear. Regularly rotating tires means one end of your vehicle won't have more grip, and the other won't be more likely to hydroplane suddenly.
With all-wheel-drive vehicles, big differences between the tread on each tire can even cause serious damage to your all-wheel drive system. On these vehicles, rotation can be even more important.
How to Rotate Tires?
Your vehicle's manufacturer will print the rotation pattern they want in your owner's manual, but since there are only a few basic patterns, we'll talk about them here.
For front-drive vehicles, a Forward Cross is the most common. In this pattern, you move the front tires directly rearward, and the rear tires switch sides and move to the front. So, the left front ends up on the left rear, and the left rear ends up on the right front.
For rear-drive and 4x4 vehicles, a rearward cross is often recommended. In this pattern, the rear tires are moved to the front axle while the front tires are moved to the rear and switch sides. The left rear would move to the left front and the left front would move to the right rear.
In a vehicle with a full-size spare on a matching wheel, the spare would move to the right-side rear axle, while the tire that was going to move to the right rear becomes the spare.
Exceptions
Some vehicles, especially performance cars use staggered size or directional tires. If the tires on the front and rear are different sizes, then rotate tires left and right on the same axle. If the car uses directional tires, swap tires front and rear on the same side. If a vehicle has directional and staggered sizing, then tires cannot be rotated. If a tire is marked with a directional arrow, make sure that the arrow is always pointed forward: towards the vehicle's nose.
Forget the Mechanic, do it Yourself
Any repair shop can handle your tire rotations, but if you've got less than an hour, you can do them yourself. Doing these rotations yourself, along with some other basic tire maintenance, can save you money on garage bills and give you a better sense of the overall health of your vehicle. Here's what you'll need:
A good floor jack is essential for a DIY tire rotation. The easiest way to get your tires off and swapped is to put your vehicle in the air. All four tires in the air make it even easier. Yes, we know your vehicle came with a jack in the trunk or under a seat, but don't use that jack for a tire rotation. Those small jacks are meant for emergencies only. Save them for emergencies only, get a proper floor jack for home use.
Floor jacks come in multiple shapes, sizes, and styles, and the jack you need depends on the vehicle you drive. For example, a low-riding sports car or sedan needs a low-profile jack. One that is thin and close to the ground can slide under your vehicle's low nose and side skirts so that it can reach the right spot.
A great budget option is the Pro-Lift Low Profile Floor Jack.
A taller SUV or pickup will need a taller jack. One that is full-height and that can lift your truck high enough to bring the tires off the ground. While you can use lifting blocks to make up some height if your jack is too short, these blocks should be used sparingly. They can make your jacked-up truck unstable.
Always make sure your jack can support your vehicle. We recommend picking one that can handle 1.5 to 2x the weight of your entire car or truck. Lifting your two-tonne car SUV isn't the time to cut corners on safety.
If you're already looking at upgrading your home workshop, small folding vehicle lifts let you drive over their lift arms and then raise your entire vehicle at once using hydraulics like a more portable version of a lift at a professional garage. They make the entire lifting process for rotations or other maintenance quick and easy.
Lifting every vehicle is different, so a glance at your owner's manual will tell you the right places to put a jack. The manual will also let you know the alternate jacking points, usually at the front and rear. You'll want to use those points when jacking up a vehicle for tire rotation.
Because when rotating your tires (or doing any other work that puts your vehicle in the air), it should never be held up only by the jack. Hydraulic jacks can fail with little warning, so you should always use solid jack stands in addition to the floor jack.
Again, use jack stands that can handle the weight of your entire vehicle. Put the stands under the main jack points for your vehicle once that end of the vehicle is in the air. Lower the vehicle slowly and make sure you follow the directions for your jack stands.
You'll need the right sockets and wrench to remove the lug nuts from your vehicle. A 1/2-inch drive socket set should include all the common lug nut (or lug bolt) sizes, and the sockets should be strong enough to handle the high torque of a wheel bolt.
Unless you're a bodybuilder, it will take more force than you have to break the initial fastening torque of these bolts. It's called "breaking the bolts loose" and it's the toughest part of removal. A long-handled tool called a breaker bar gives you more leverage to remove tight sockets. If you're using a breaker bar to loosen your lug nuts, do that initial loosen before lifting the vehicle. Just a half-turn is enough, and this is easier to do when the tire is on the ground.
Capri Tools makes a wide section of sizes.
An even easier way is by using an electric impact wrench. A spinning hammer inside these tools applies a sharp force to bolts which can help break that initial torque with zero work from you. It will also spin the nut or bolt to remove it. If you use an impact wrench, you need to use impact sockets. They're sockets specially made that won't shatter with the hammer impact. Regular sockets can shatter when used this way.
With your car or truck in the air, take the tires and wheels off and rotate them as directed. You can remove one at a time or remove all four, but removing one at a time makes it easier to remember where each tire came from and where it is going.
Lift the tire into its new location and lightly tighten each lug. The first time around, you just want them to be snug. Hand-tight will do. Then go around them using a wrench and tighten with a star pattern. The lugs don't need to be fully torqued, just tight. Don't use an impact wrench here. It's easy to overtighten your wheels, and that can cause damage to the bolts or studs and even failure.
Our recommendation is the Tekton 24335.
Once you've swapped all four (or five) tires, and all the lug nuts (or bolts) are tight, jack each end of your vehicle up and remove the jack stands to put the vehicle back on the ground.
Then tighten each nut (in the same star pattern) using a torque wrench. A torque wrench measures the amount of force it takes to tighten the nut, making sure "tight enough" really is. Your owner's manual will have the right torque setting, but common for cars and crossovers is 80-100 lb-ft.
The last step before you drive away is one you should do at least once a month. Using a good quality tire gauge to check the air pressure in your tires. Too high and air pressure can wear out the centers of your tires more quickly. It can also mean poor traction in wet weather.
Too low tire pressure and your tire can fail from flexing and overheating. It will also hurt handling and fuel economy. The proper pressure for your tires is on an official-looking sticker (usually on the door frame or trunk lid). This isn't the same as the maximum pressure marking on your tire, which is not the setting you should pick.
Your tires may need more air, and you can use a tire inflator to make it right from home or you can pay to use an air hose at most gas stations.
You aren't done your tire rotation until 60 miles after you've rotated the tires. Every time your wheels come off, for any reason, it's essential that you retorque them after around 60 miles of driving. Use your new torque wrench to make sure they're set correctly. If one wheel has come loose, check it every 60 miles or so until it stops. If those nuts keep loosening, then they (or the studs they attach to) need to be replaced.
Now you're done for another six months or 6-8,000 miles. Time to go back and enjoy driving your car, truck, or SUV.
Tires worn out? Start shopping with eBay Motors.
Evan moved from engineering to automotive journalism 10 years ago (it turns out cars are more interesting than fibreglass pipes), but has been following the auto industry for his entire life. Evan is an award-winning automotive writer and photographer and is the current President of the Automobile Journalists Association of Canada. You'll find him behind his keyboard, behind the wheel, or complaining that tiny sports cars are too small for his XXXL frame.
More by Evan Williams


Comments
Join the conversation
You say, in closing, "you're done for another six months or 6-8,000 miles." What has the number of months to do with the rotation of the tires. If a car is driven, say, 500 miles a month, then wouldn't it be correct to rotate the tires once every 12-16 months? On the other hand, if you drive 2,000 miles a month, the rotation would need to occur in 3-4 months. Isn't it the amount of driving, without regard to the amount of time, that determines when tires should be rotated?