


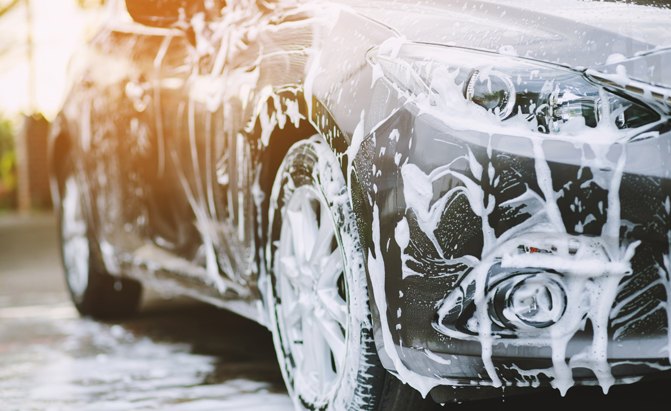
How to Wash a Car Like a Pro
Washing our cars: it’s something we all do, yet some of us may wonder if there is a better way.
Sure, it’s the easiest thing in the world to simply drive into an automated car wash, deposit a few bucks, and let the programmed spray nozzles and brushes do their thing. But that route is never going to yield the best possible shine, and over time, those filthy, grit-holding scrubbing machines can do a number on your paint. You can get a much better, more thorough clean – with less damage to your paint – by washing your car by hand.
Unfortunately, unless you know what you’re doing, you can still end up putting fine scratches and swirl marks into your car’s paint, or with a less-than-stellar luster.
Looking to obtain that concourse-worthy shine? With a little help from the car care experts at eBay, we’ll walk you through how to wash a car to achieve a professional-level clean, including tips on the best tools and products to use, and how to use them.
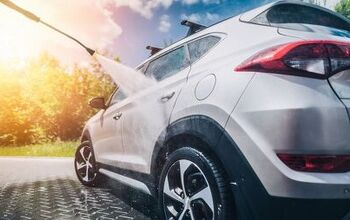
Lead photo by fongbeerredhot/Shutterstock.com
1. Prepare
As basic (or unnecessary) as it may seem, every car wash should start with an appraisal of its state. Are you preparing to tackle an off-roading rig that’s caked in a thick layer of dried mud, or a collectible classic that’s been sitting in a dusty garage? Answering these sorts of questions will guide your decisions when it comes to which of the below steps you should follow, and which you can skip for now.
Additionally, this first step should involve parking your car in a shaded area away from direct sunlight, if possible. This will not only minimize the chances of your cleaning and polishing products drying out on your car’s surface, it’ll also reduce the number of water spots leftover after rinsing.
One more tip: plan on having at least three buckets handy. One for rinsing your washing mitt or brush between stages, one for your car soap or shampoo, and one for your dedicated wheel and tire cleaner.
2. Dust (Optional)
If the only filth on your garage-parked classic is a light layer of dust, there’s no need to overthink it; you might be able to get away with nothing more than a quick dusting. Get yourself a good quality car duster and work your way across the car, lightly sweeping each surface without applying pressure to the body panel.
Good car dusters are often treated with paraffin wax or something similar, to minimize the risk of scratching your paint, but you should be aware that, over time, dusting can introduce tiny, microscopic scratches. Still, that’s nothing that can’t be corrected with the occasional polish and wax, so no need to be overly concerned about it.
3. Wash the Car Body
Now, for the main attraction: washing your car’s body. Disregard anything you might have heard about starting off with a good spray with plain water. If you want your finish to last, it’s imperative that you first emulsify whatever grit is on your car, coating it in a thick layer of lubricating soap so that it doesn’t scratch or dull your paint.
- Start with the roof of the car, dipping your washing mitt into your soap/water mixture and dripping suds across the panel before gently wiping back-and-forth across the paint.
- Gravity works in your favor here, as any excess suds will drip down the sides of the car, emulsifying the grit and giving you less ground to cover as you go.
- Move on to the body sides next, using the same process, working your way around the car until every square inch has been coated in suds.
- Remember to stop periodically and thoroughly rinse your mitt in your pail of plain water to remove excess grit, before dunking it back into your soap/water mixture.
It’s important to work with only soaps and shampoos from reputable brands, specifically formulated for cars, and to stay away from using dish soap or some other ill-suited detergent unless you want to strip every ounce of wax off your car. Additionally, always aim for only light pressure during this stage – lest you scrape grit right into your car’s paint.
4. Wash the Wheels and Tires (Optional)
Depending on how filthy your wheels and tires are, you may choose to skip this step. After all, they’re in constant contact with the road, and the primary recipient of whatever dust is produced by your brakes, so they’re almost definitely going to get dirty again in short order.
If you do choose to give your wheels and tires a proper cleaning, however, be sure to use a dedicated bristle brush and a good, purpose-made wheel and tire cleaner solution. (Don’t ever use this brush on your car’s body, as any metallic brake dust it picks up will be especially prone to scratching the paint.) Apply the cleaner, being sure to get it in-between spokes and onto the walls of the wheel barrel, and lightly but thoroughly agitate it with the brush.
5. Rinse
Again, start from the top of the car and work your way down, spraying a liberal amount of plain water to carry all that soap and grime off your car and into the gutter. If you’re using a garden hose, don’t think too hard about what sort of water pressure you’re using; excessive water pressure is only a concern if you’re using a pressure washer.
For the best results, after you’re through rinsing the car, carefully towel it dry. This minimizes the chances of hard water spots lingering on your car’s paint.
6. Use a Clay Bar (Optional)
If you aren’t familiar, clay bars are a commonly-used auto detailing tool that works to remove embedded contaminants from the surface of your paint. You lube up a section of the car, rub clay back-and-forth over it, and it picks up fine metal particles, tiny pieces of dust, and other small but significant bits of junk that can eat away at your paint over time.
For the best results, you should plan on doing this process at least twice a year, though in reality, once a year will suffice for most.
- Start by getting a good clay bar and tearing it into four equal pieces.
- Set three aside for now, and flatten the last one into a circle spanning about the width of three fingers.
- Spray clay bar lubricant over a small section of car body.
- Begin sliding the clay piece back and forth through the lube (as the clay picks up fine particles, you’ll notice it becoming easier and easier to slide).
- Once sliding becomes effortless, move onto the next small section of the car body.
As you go, periodically inspect the clay for clarity. If it starts looking pretty filthy, either turn the clay over or knead it repeatedly to disperse contaminants throughout the clay, so you’re not rubbing them directly against your paint. If you drop your clay piece, or it becomes too filthy to continue using, simply discard it and grab one of the other pieces.
7. Polish (Optional)
Polishing your car helps minimize the appearance of fine abrasions and swirl marks, giving your paint a smooth, mirror-like look. That said, car polish is itself an abrasive compound, removing some tiny amount of paint each time you use it. To make your paint last, polish no more than once per year, and take care not to overdo it.
The first step? Get yourself an orbital polisher. For newbies, a random orbital polisher or dual-action one is best as it helps mitigate the risk of paint burn and swirl marks. Keep in mind: these polishers work by rotating a pad very quickly over the surface of your paint. Naturally, the outside of the pad rotates more quickly than the center. More speed means more friction, and more friction means more heat and abrasive action. This makes peaks and creases in the bodywork especially susceptible to burning, so exercise caution.
Apply a good quality polishing compound directly to the pad, then wipe it over a moderate area of bodywork. If your polisher has an adjustable speed, you can use a low-speed setting to help you accomplish this. Once the compound is on the body, crank up the speed and meticulously work that section slowly, until every square inch has been touched up. For deeper scratches, use a cutting compound or anti-scratch polish.
Be sure to take your time here and try not to let any of the compound dry out as you’re working. Swap pads if needed, if the pad you’re using becomes too contaminated, or gets caked in dried-on compound.
8. Wax
Now, for our favorite part of the process: waxing. Wax helps fill in micro-abrasions on the paint’s surface, and seals it to protect it against environmental damage. It’s the single most important step for achieving a deep, lustrous shine, just like your car had when you first saw it on the showroom floor.
There are many easy-to-apply spray waxes on the market, but for best results, we recommend a high-quality liquid wax. To apply by hand, get a foam applicator pad slightly damp on one side, and spread a small amount of liquid wax over it. Wipe it onto the car body using small, circular motions, and spread it over a moderately sized area of bodywork. Spread and smooth it as much as possible before moving on to other sections. Once you have one panel completely coated in wax, flip the pad over and use the clean side to buff the wax using larger circular motions.
9. Clean Your Glass
Being able to see clearly is important for 10 out of 10 driving tasks, but if you’ve been cleaning your car’s windshield and windows with an ammonia-based glass cleaner like Windex, stop! That ammonia can damage the coatings on the glass over time. Instead, always use a good car-specific glass cleaner (see here for our top recommendations), and pick yourself up a dedicated windshield cleaner brush. It will help make those hard-to-reach spots easier to access.
Don’t be afraid to clean your glass multiple times – especially on the outside – if you want to completely rid it of streaks or caked-on grime. To finish, apply a water-repellent product like Rain-X (seriously, the stuff is like magic) using a clean microfiber towel on the outside. For inside the cabin, Rain-X makes a two-in-one glass cleaner and anti-fog treatment that helps cut down on window fogging.
10. Clean the Interior
No professional-caliber car wash would be complete without a good, thorough cleaning of the car’s interior. Begin by brushing and vacuuming the carpeting. Brushing may sound unnecessary, but trust us; you’re not vacuuming properly unless you brush out your carpet first, as it helps loosen stuck dirt and other debris, making it easier for your car vacuum to pick up.
Next, use a quality interior cleaner, like Meguiar’s All-Purpose Cleaner. Be aware: solutions like this one ship in concentrated form – too concentrated to apply directly, so always make sure to dilute the cleaner the proper amount by cutting it with a quantity of plain water. You can use a higher concentration, such as four parts water to one part cleaner, for most surfaces, but for more delicate materials (such as leather) you should use a more diluted form, i.e. 10 parts water to on part cleaner, and always test it in an inconspicuous area first before proceeding.
Or, preferably, you can simply opt for a dedicated leather cleaner and conditioner made for automotive use. These products are specially formulated to strip grime from your leather without harming the finish, as well as rejuvenate it by replacing lost moisture, so it doesn’t dry out. Conditioning is an imperative and yet often-skipped part of leather care, and unless you like the thought of hard, split leather upholstery, you should plan on cleaning and conditioning at least twice per year.
11. Enjoy Your Squeaky-Clean Car
That’s it; you’re done! Take a seat and bask in the glow of your hard work and professional-caliber shine.
For more car care DIY tips and tools, visit eBay.com.
We are committed to finding, researching, and recommending the best products. We earn commissions from purchases you make using the retail links in our product reviews. Learn more about how this works. Main photo credit: fongbeerredhot / Shutterstock.com
We are committed to finding, researching, and recommending the best products. We earn commissions from purchases you make using the retail links in our product reviews. Learn more about how this works.
Main photo credit: fongbeerredhot / Shutterstock.com
More by AutoGuide.com Staff


Comments
Join the conversation