


Here's How to Clean Your Headlights and Make Your Car Shine
Every new vehicle sold today has headlights made of a polycarbonate plastic that resists the impact of small debris, even in extreme conditions. Whether it’s 100 degrees or 20 below, a rock kicked up by the truck in front of you won’t break the bulb behind these plastic shields.
The only problem is, this strong plastic slowly breaks down when exposed to the sunlight, coupled with swings from extreme heat to extreme cold. Modern vehicles have a coating that protects from the Sun’s rays, but even that coating breaks down over time, leaving the plastic lens to discolor to a faded yellow or light brown.
Not only do the oxidizing headlight lenses begin to discolor, they usually cloud up as well, making them less effective. Aging headlights are ugly and dangerous, but in many cases, replacements can be expensive. Fortunately, you can rejuvenate your lenses with items available on eBay, along with some good ol’ elbow grease.
The Items You’ll Need
Bringing your headlight lenses back to life isn’t difficult, but you’ll need some items to do it right.
The most effective way to shine your headlights is with a power tool, such as an electric or pneumatic drill, plus a kit that comes with all the necessary refinishing items.
Here are some good headlight restoration kits we’d recommend:
- Meguiar’s Heavy Duty Headlight Restoration Package, which comes with the brand’s PlastiX polishing compound along with various grades of sandpaper.
- 3M Headlight Lens Restoration System Kit features a 3M polishing compound, as well as the tape needed to protect your paint during sanding.
- Lostar’s Headlight Restoration Kit comes with sanding and buffing discs, plus a three-step polishing compound and chemical sealant.
- For even more options, check out our list of the best headlight restoration kits here.
In addition to the kits listed above, there are a few extra items you may want to buy, especially when dealing with stubborn headlight haze:
- Microfiber towels
- Additional buffing pads and sanding discs (especially for older vehicles)
- Tape to protect the body around the headlights ( 3M Blue Painter’s Tape is a great option for this)
If you want to really attack those cloudy headlights like a professional though, an orbital buffer and appropriate wax are key. Buying an orbital is far more expensive than simply using a drill and any of the above kits, but since these buffers are made to refinish surfaces, they’re more effective, and more comfortable, for sustained periods of polishing.
Finally, after you’ve got your headlights nice and clear, you’ll want to add a new protective coating, such as this sealant from Blue Magic.
Got all that? Now you’re ready to tackle the project. Here’s the step-by-step.
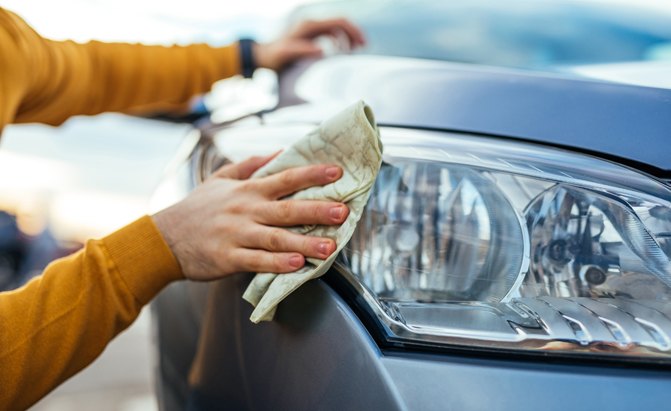
1) Clean the Headlights
The first step in removing the cloudy surface haze on your headlights is to thoroughly clean the lenses with soap and hot water. You don’t want to have a bunch of bugs and road grime in the way for the next steps.
2) Protect the Body
Next, tape off the painted body parts around the headlight, such as the hood, fenders and the front fascia. If you accidentally hit those parts with the sanding discs, you will damage the paint. Exposed paint can also be scuffed by a quick, errant pass of the drill or orbital, so don’t skip this step.
3) Get to Sanding
When using a drill with a sanding disc, you want to start with the coarsest grit, constantly spraying the surface with water while moving in a side-to-side motion. If you don’t have a spray bottle, you can keep a bucket of water nearby and regularly dip the sanding disc in that water. The point here is to keep the surface nice and wet, so you don’t damage the lens.
Headlight restoration kits will generally start with a 1,000 grit sandpaper or sanding disc, followed by either 2,000 grit, 3,000 grit, or both. You want to gradually step up to the higher numbered, smoother sandpaper, alternating direction each time you switch grits: start by sanding horizontally with the 1,000 grit, then, when you move to the 2,000 grit, sand in a diagonal motion from top left to bottom right.
Finally, during the third stage of sanding, start at the top right and sand towards the bottom left. This will help to balance out any swirl marks in the lens surface.
4) Time to Polish
Once you’ve sanded the surface well enough to loosen the hazy coating, it’s time to go to the buffing pad and polishing compound. Dispense the compound onto the buffing pad and start in one corner of the lens, working across to the other side, then dropping down and heading back across in the other direction. Buff back and forth until you have covered the entire lens.
Then use a microfiber towel to clean off the used polishing compound. Most brands recommend that you apply the final polish with a microfiber towel by hand, similar to what you would do when waxing the body.
Apply the same steps to the other headlight. Once finished, you should have clean, clear headlight lenses that will project better light at night and look far nicer during the day.
5) Apply a New Protective Coating
Finally, it’s a good idea to apply a new protective coating to the headlight lenses to help prevent more hazing in the future. For example, the Blue Magic Lens Sealer mentioned above will protect the plastic lenses from sunlight and UV rays, similar to the original coating, sealing out dirt and grim and preventing yellowing and hazing from reappearing.
That’s it! Now both you and your headlights are ready to get back on the road.
For more great car care DIY tools, visit eBay.com.
We are committed to finding, researching, and recommending the best products. We earn commissions from purchases you make using the retail links in our product reviews. Learn more about how this works.
More by AutoGuide.com Staff


Comments
Join the conversation